A WooCommerce to Shopify migration is three jobs, not one: move the data, rebuild what does not move, and protect the search traffic your old URLs earned. In any WooCommerce to Shopify migration the data transfer is the easy part, because tools exist for it. The part that costs stores traffic is the address change. This guide gives the order of work, a table of what moves, and the redirect rules that keep your rankings from resetting.
WooCommerce to Shopify migration: what moves and what you rebuild
Two migration-tool vendors describe the boundary, and they agree on most of it. They are sellers of migration software, so read the lists as descriptions of their tools.
| Moves with an app | Rebuilt by hand |
|---|---|
| Products, variants, images | The theme and design |
| Collections or categories | WordPress plugins and their data |
| Customers and orders | Payment and shipping settings |
| Discounts | Product reviews, per Matrixify |
| Blog posts and pages | Customer passwords |
| Redirects, where the tool supports them | Anything that depended on a plugin |
Matrixify says a migration app does not carry over the theme and design, WordPress plugins, payment and shipping settings, or product reviews. LitExtension adds that WooCommerce themes cannot be transferred to Shopify at all and that customer passwords cannot be moved, since each system encrypts them differently. Plan to ask customers to reset passwords and to tell them in advance.
Two structural differences need decisions, not just mapping. LitExtension notes that WooCommerce categories do not work exactly like Shopify collections, and that variants and attributes are structured differently. Decide how each category becomes a collection before you import.
Choosing a WooCommerce to Shopify migration method
| Method | Fits | Watch for |
|---|---|---|
| Manual CSV export and import | Small catalogues | Easy to miss data; weak for orders and redirects |
| Basic import app | Simple product data | May not cover customers, orders, blog posts or redirects |
| Automated migration tool | Larger catalogues with orders and customers | Needs careful data mapping and a review afterward |
| Expert-assisted migration | Custom fields, plugin data, SEO-sensitive stores | Needs a scoped project first |
The method list follows LitExtension’s comparison. In a WooCommerce to Shopify migration, Shopify’s own help guide begins with the same decision: Step 1 is choosing how to migrate, and it covers products first, with customers, reviews and order history as optional later steps. If you want a second opinion on which path suits your store, our Shopify development page describes how we scope that work.
The checklist, in order
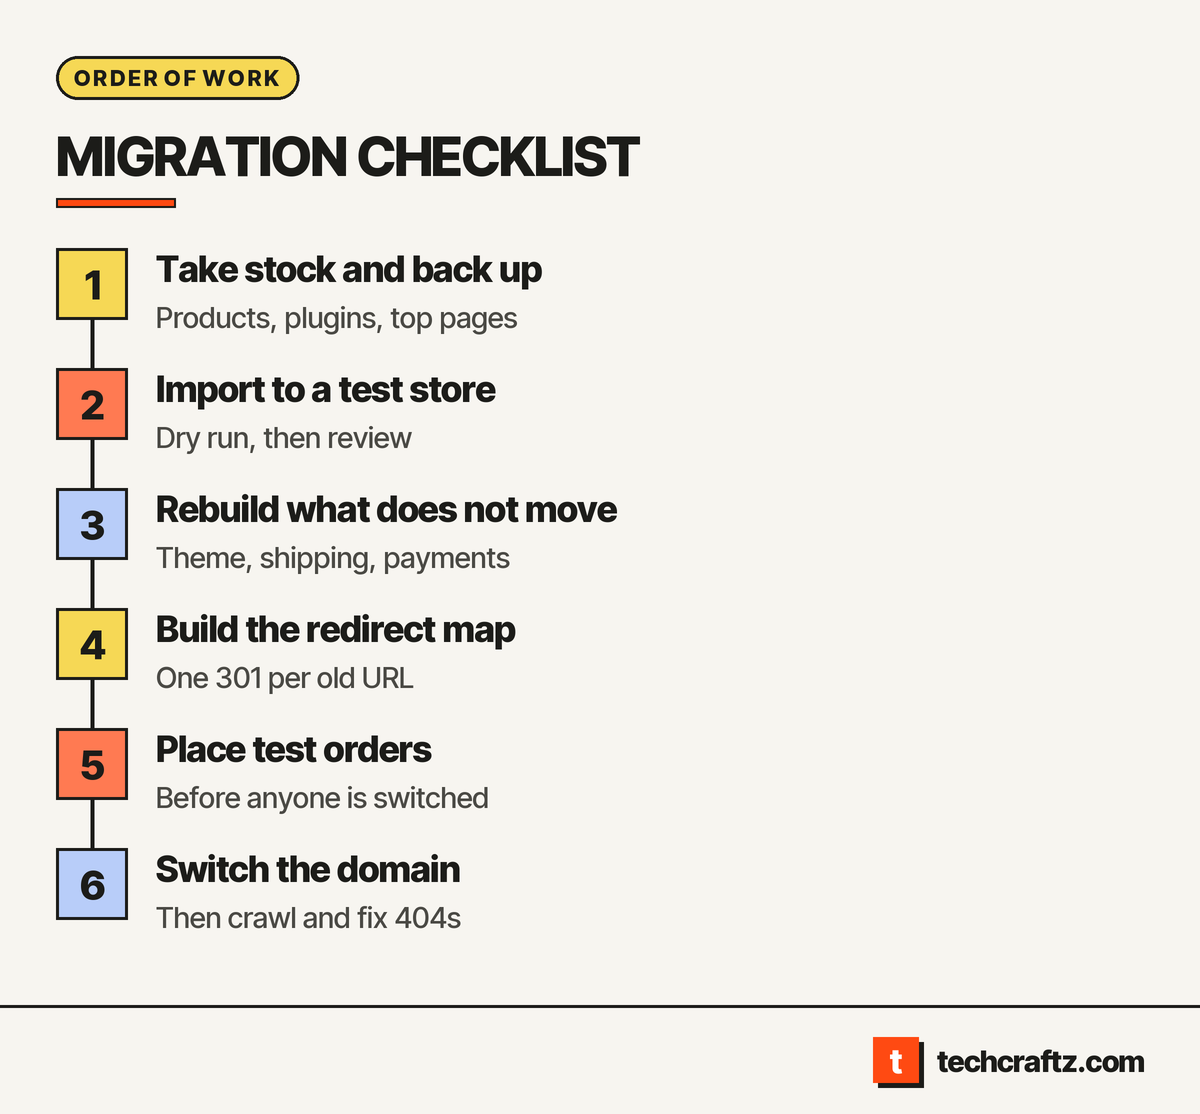
- Decide to move for a reason. If you are still weighing platforms, our comparison of WooCommerce vs Shopify covers ownership and limits.
- Take stock. List products, categories, plugins, payment methods, shipping rules and every page that earns traffic.
- Back up the WooCommerce store. The old store stays untouched; Matrixify notes its app only reads data from it, so you can keep selling while you build.
- Export and map. Export products, then decide how categories become collections and how variants map.
- Import to a test store and review. Use a dry run if your tool offers one, and check images, variants and inventory. Matrixify’s dry run produces a results file listing failed rows so you can fix and re-import only those.
- Move customers and orders if you need them. These are optional steps in Shopify’s guide. Rerun the import near launch for orders and customers created since, as Matrixify describes.
- Rebuild what does not move. Theme, shipping, taxes, payment provider and staff accounts. Shopify’s guide covers each as its own step.
- Build the redirect map. See the section below.
- Place test orders. Shopify’s guide and LitExtension both recommend test purchases before launch.
- Switch the domain. Point DNS to Shopify only after the checks pass.
- Check after launch. Crawl the old URL list, watch for 404s and submit the new sitemap.
SEO risks in a WooCommerce to Shopify migration
LitExtension warns that URL structures differ between the platforms, which can cause 404 errors or traffic loss if not handled. Shopify’s own guide puts SEO setup, including redirects, meta descriptions and sitemap submission, in its final step and marks it optional. For a store with no organic traffic, that may be true. For a store that earns visits from search, we treat it as required.
| Risk | Why it happens | Control |
|---|---|---|
| Changed product and collection URLs | Shopify uses fixed prefixes such as /products/ and /collections/ | One 301 redirect per old URL |
| Lost pages | Categories, tag pages or plugin-generated pages have no equivalent | Decide a target or retire them on purpose |
| Missing metadata | Titles and descriptions lived in an SEO plugin | Export and re-enter before launch |
| Blog posts moved but unlinked | Blog structure differs | Map posts and check internal links |
| Redirect type chosen wrongly | Temporary redirects do not signal a move | Use permanent redirects |
Google’s documentation explains the last row. A permanent server-side redirect (301 or 308) signals that the target should be canonical and shows the new URL in search results, while a temporary redirect keeps the source page in results. For a platform move, use permanent redirects.
Building the redirect map
- Export every URL that matters: products, categories, blog posts, static pages. Add the pages that earn the most visits and the most links first.
- Pair each old URL with its Shopify equivalent. Presta reports fixed /products/ and /collections/ prefixes, and WP All Import says Shopify enforces subdirectories such as /products/, so expect every product address to change.
- Load the pairs into Shopify’s redirect tool, or let a migration tool create them, if it supports that.
- Test a sample by hand, then test all of them with a crawler after launch.
- Keep the redirects in place. They are part of the store now.
Cutover and the first weeks
For the end of a WooCommerce to Shopify migration, LitExtension’s post-migration steps are a sound minimum: verify the data, switch DNS, configure shipping and payments again, and place test orders. Add three things. Pick a quiet trading period for the switch, not a sales peak. Keep the old store available for reference until the new one has taken real orders. And review search reports in the weeks after launch for crawl errors and for pages that lost visibility.
When to wait
A WooCommerce to Shopify migration is not always the answer. If your trouble is a slow site, a messy plugin stack or a missing feature, check whether fixing the cause is simpler than changing platform. If the store depends on custom logic that Shopify apps cannot reproduce, the decision may be about custom software, which our article on the custom software development process and our guide to the discovery phase explain.
Send the brief, get a written scope
techcraftz puts scope, milestones and the estimate in writing before the first line of code, then hands over the code, the accounts and the keys. For a migration, that means a written list of what moves, what is rebuilt and which redirects are owed. See the Shopify development page, send the brief, or read more about techcraftz.
Last checked: October 14, 2026. Tools and platform guides change; confirm current steps in Shopify’s own migration guide before you start.
Talk to us about your project
Tell us what you need. We help you scope the build, the milestones and a realistic estimate.
View services